Heat Pumps
We do not install heat pumps systems, however, we do offer a service and repair service on any existing units.

Full service and controls check

All major heat pumps serviced or repaired

Only genuine replacement parts used.
Coil Cleaner

Heavy-duty condenser cleaner. SuperClean is quite simply the strongest coil cleaner on the market.
Highly concentrated and effective, it will safely remove the wide range of contaminants commonly found in condensers without damaging the coil.

We use the Superclean condensor cleaner to remove the majority of contaminants that have built up in the coils.
The foaming action brings out the dirt and leaves the coil sparkly clean, leaving behind a super efficient coil that will help maintain a healthy and cost-effective system for you.

After just 30 minutes the foam is washed away using clean water.
As you can see, the coil is clean and ready for use once again.
The only safe way to remove dirt without damaging the fins and coil.
Pressure Loss

A client called me as their unit was making noises and an error code was on the controller.

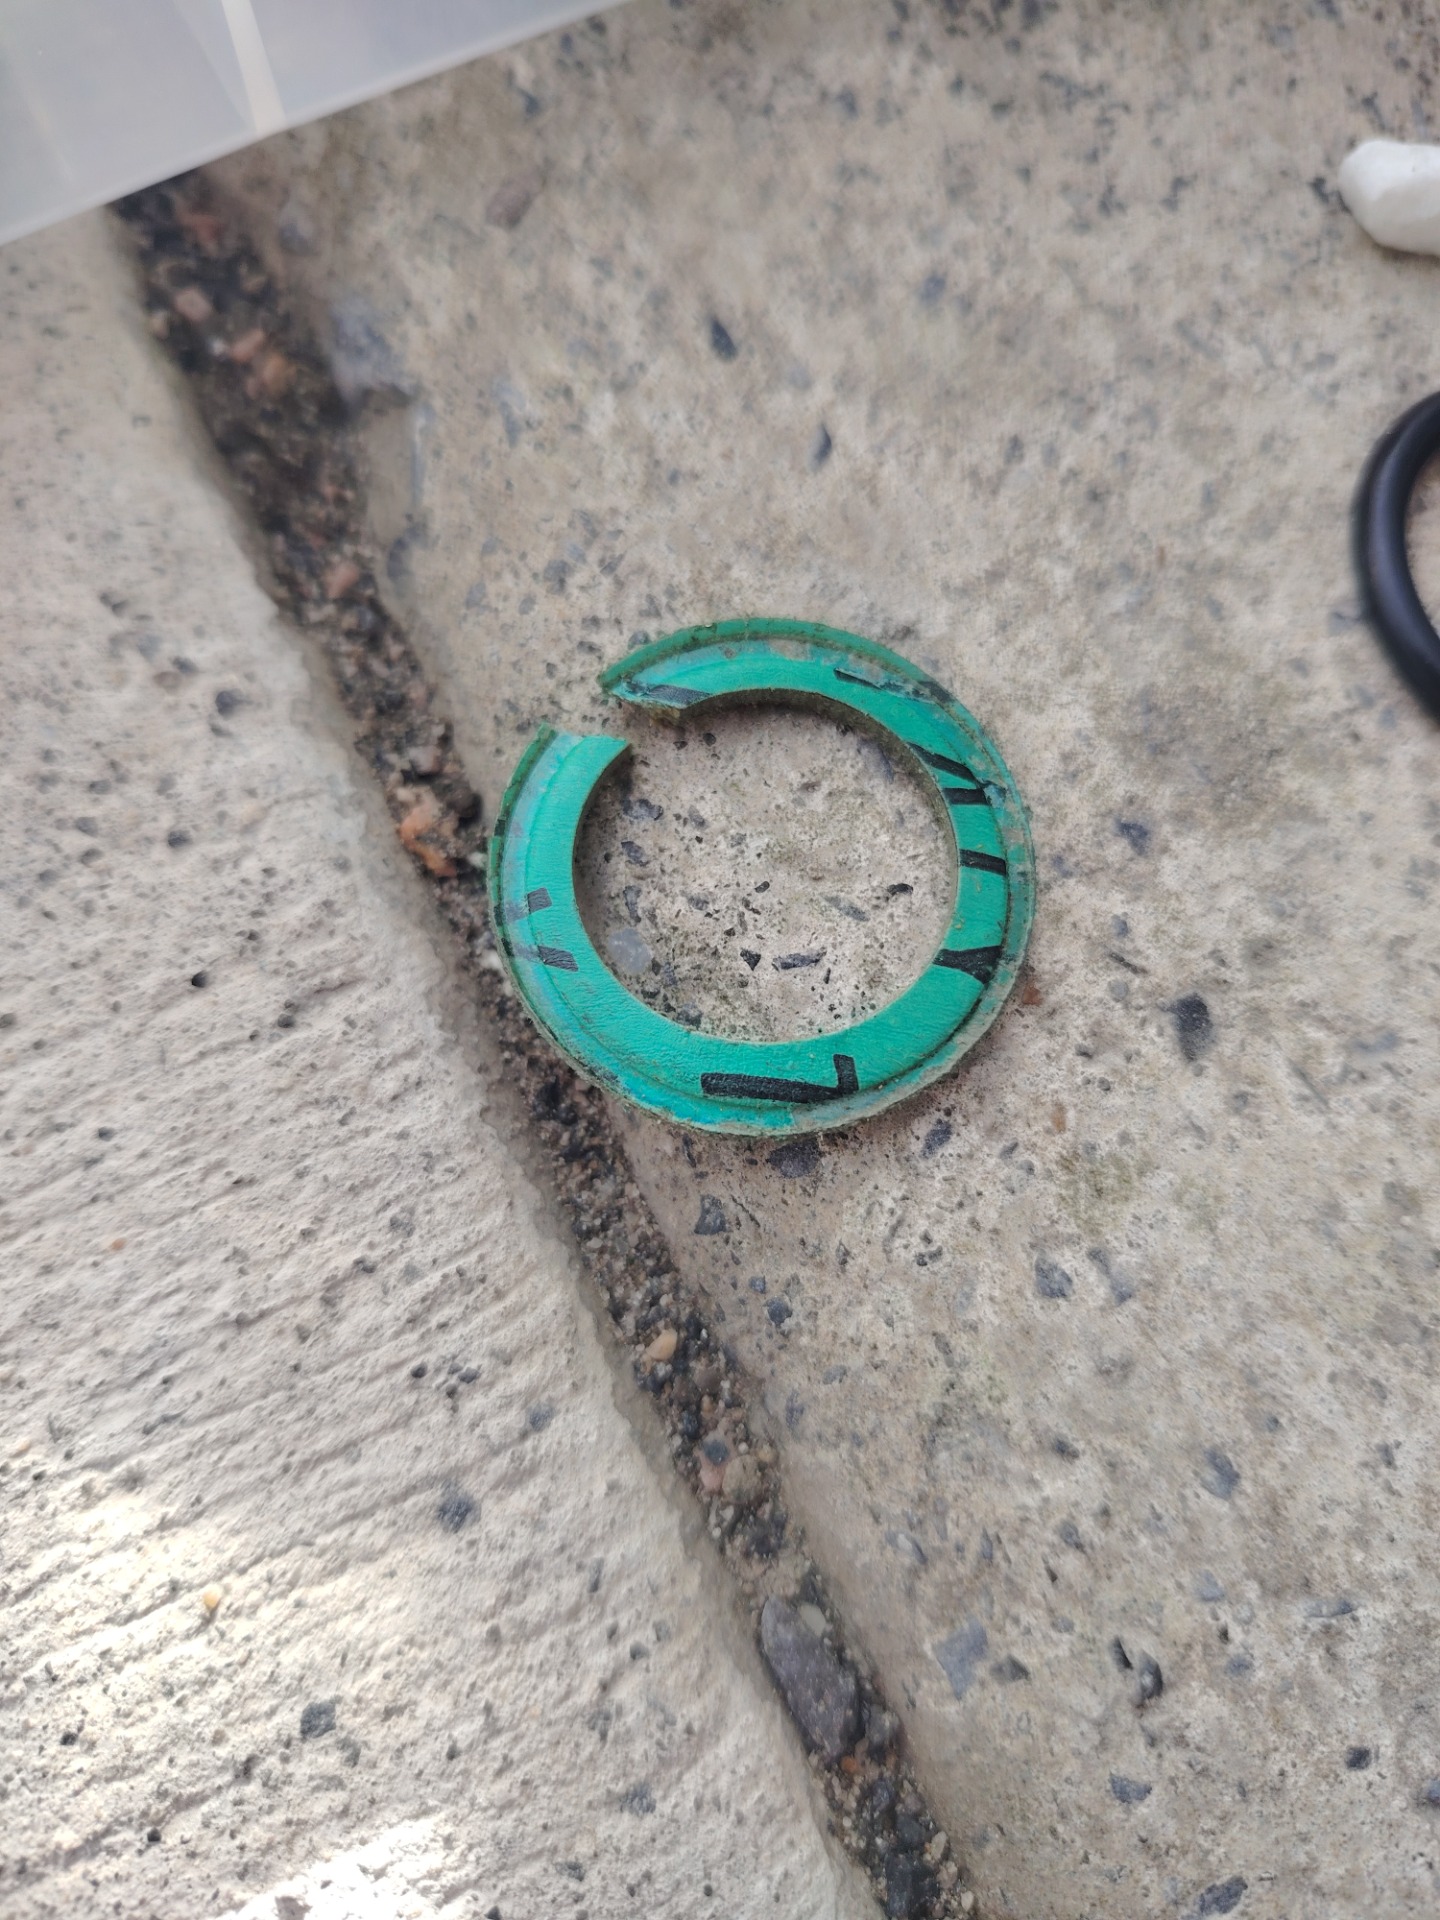
A quick check of the outdoor unit, a leak was found on the union due to the fibre washer.

After replacing the washer, the pressure was holding and no more noises and errors.
Banging Sounds in System

A client reported an error with her Hitachi heat pump - low flow rate and also a banging noise coming from the unit.
A quick check revealed that the banging noise was coming from the motorized zone valves when calling for/closing down. Normally this is due to the zone valves being fitted in the wrong flow direction, however, these were not......strange.
The error appearing on the unit indicating low flow rate, this would have been the reason why. If there are any undulating flows on the circuit, it reduces the flow rate until the unit shuts down.
After opening the heat pump unit, I noticed that the pump had been refitted but in the wrong direction - this meant that the unit flow was now the return.

After draining down the system, isolating the heating circuits, I removed the pump and refitted with the flow direction now correct. If you look at the images, you will find a flow arrow on the strainer valve located just above the pump.
After refilling and venting the system, I turned on the unit and tested both zone valves....both now nice and quiet when operating
PLUS, the flow rate was now steady and no more errors...
Just goes to show, it is important to check everything thoroughly before and after a service.
Joule E91 Thermostat

having been to site on numerous occasions as the owners report that despite the room being cold, the heating is not coming on.
On the Joule E91 stat, the large number in the centre indicates the actual room temperature, whilst the smaller number below indicates the set point for heating to come on (Calling for heat).
A simple check, have a normal thermometer to hand and measure the room temperature, is it the same as what is being indicated on the larger number ? If not, then your stat needs to be calibrated.
Calibration is best undertaken by a trained engineer, as often other parameters in engineer mode can be accidently changed and then you have a whole new problem.

Once you have access to the parameters, the very first one is how you calibrate the thermostat.
By adjusting the temperature using + and - keys, you can set the value to the same temperature as displayed on your thermometer.
Your thermostat temperature is now calibrated and good to go.....

Daikin - New Fan Motor & PCB Board
Images from a recent repair we carried out on a Daikin outdoor unit.
The new tenants turned on the heat pump and discovered a fault.
After attending site, we traced the fault to the fan motor/PCB and contacted Daikin for part numbers.
Replaced the fan motor and PCB, fired up but found another issue with a blown fuse. After replacing the fuse the unit fired up perfectly and tenant was back in business.....

Hitachi Hot Water - Off
Arrived at a client's home as they reported having no hot water.
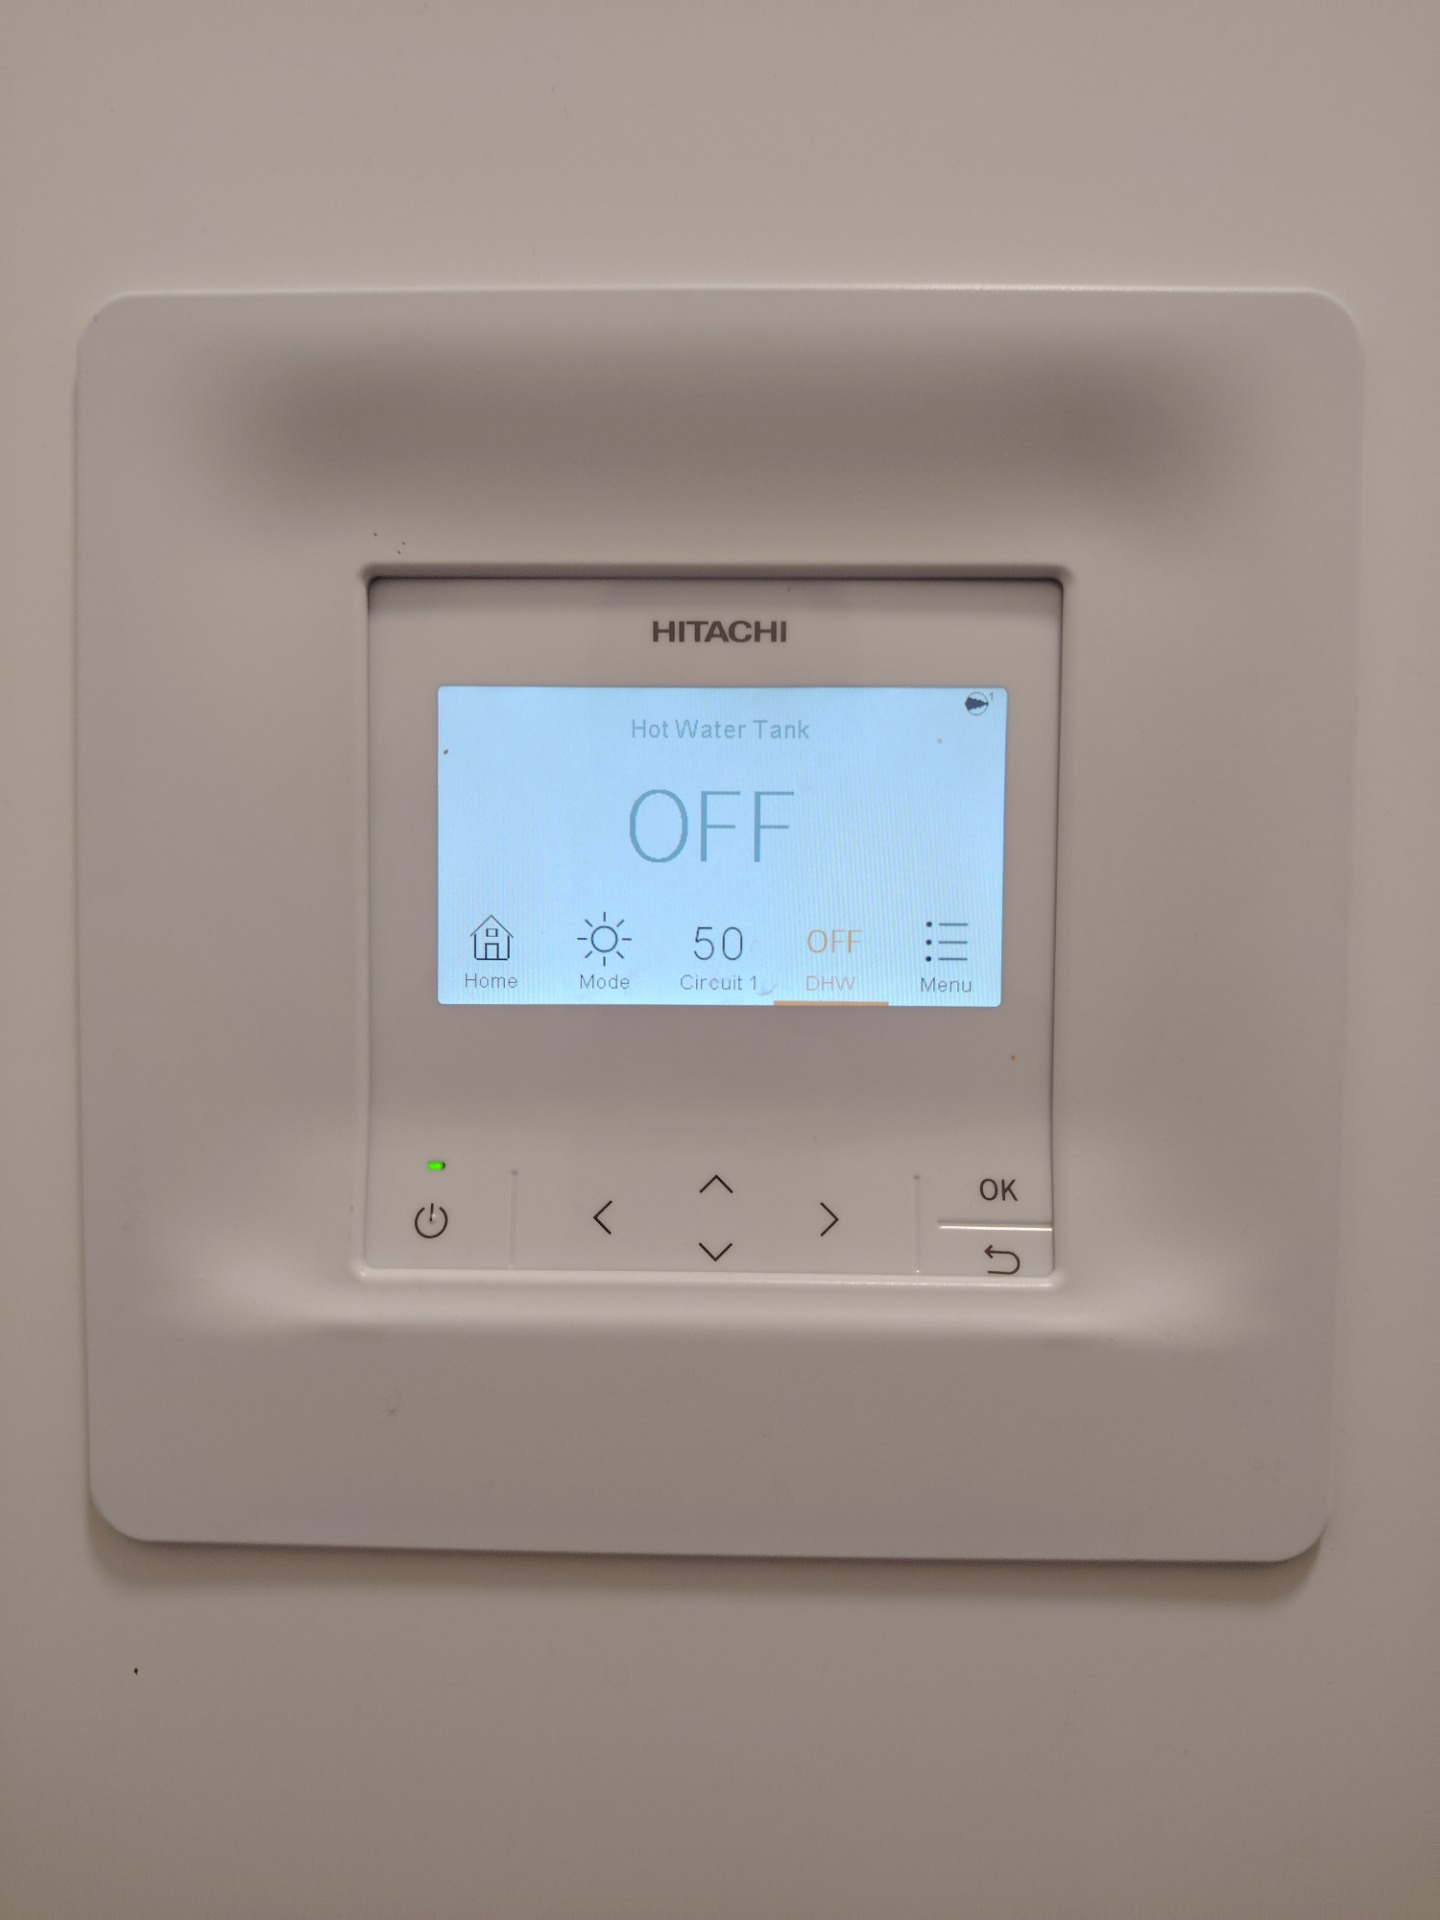
As you can see on the controller the hot water is in the 'OFF' position, likely a result of the recent storms.
To reset, all you have to do is to use the 'Right' arrow to move selection to 'DHW' and then simply push the 'Power Button' - located on the righthand side of the controller....and BINGO...DHW is back on.
For more help and advice then use our 'Contact' page and send a message outlining the faults that you are experiencing with your heat pump.
